Hello folks,
I am back and this time with some mural work. I thought of creating an ''Owl sitting on a branch of a tree'' on a jewelry box.
Today I also thought I should share two secrets with you'll.
1. What material I use to make a mural and some tricks
2. Antique finish
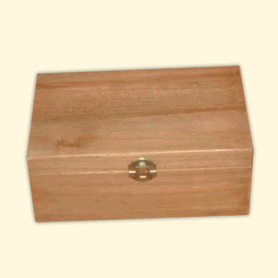
I used a wooden box (bought from the local art shop). And worked on the mural by using ''M-seal'' (one could also use clay). I would recommend using clay for first timers since M-seal can dry faster, leaving less time to play around :). And then I used tools to shape the owl! Ex: the back of a marker pen for the eyes. A paper tool (rounded bone spatula) for the feathers.
Once the complete mural was done, I let it dry for a day.
For the antique finish, I gave a thick black coat to cover the complete box (it is important not to leave any crevice unpainted at this stage).
Finally I gave a coat of gold to the entire box except for the mural. For the mural, I gently brushed the gold to give an antique effect. Again it is important NOT to fill the crevices this time and leave some black spaces.
Voila an antique finish!! This is how it looked at the end.
This was gifted to a friend on her birthday! I hear she loves it and already has her best jewelry sitting in it.
Hope you get hands on some clay and try your first mural.
Good luck!
I have some special orders already! So keep an eye for some more soon :)
 |
| Wooden box from the local art shop |
Today I also thought I should share two secrets with you'll.
1. What material I use to make a mural and some tricks
2. Antique finish
I used a wooden box (bought from the local art shop). And worked on the mural by using ''M-seal'' (one could also use clay). I would recommend using clay for first timers since M-seal can dry faster, leaving less time to play around :). And then I used tools to shape the owl! Ex: the back of a marker pen for the eyes. A paper tool (rounded bone spatula) for the feathers.
Once the complete mural was done, I let it dry for a day.
For the antique finish, I gave a thick black coat to cover the complete box (it is important not to leave any crevice unpainted at this stage).
Finally I gave a coat of gold to the entire box except for the mural. For the mural, I gently brushed the gold to give an antique effect. Again it is important NOT to fill the crevices this time and leave some black spaces.
Voila an antique finish!! This is how it looked at the end.
This was gifted to a friend on her birthday! I hear she loves it and already has her best jewelry sitting in it.
Hope you get hands on some clay and try your first mural.
Good luck!
I have some special orders already! So keep an eye for some more soon :)
.JPG)
.JPG)
amazingggggg.... may be you can put some intermediate pics aswell.. that would help in better understanding of how the art was being shaped... its looks very professional :)
ReplyDeleteThanks Aditi. Yes, that is the idea but when I was doing this project I was so engrossed in it that I forgot :)
DeleteNext time I will :)
This is excellent darling. The blog, the presentation, everything! :*
ReplyDeleteThanks my admirer!! :)
DeleteNice work!!!
ReplyDeleteThank you Sanjay Rangnekar!!! :)
DeleteAs the recipient of this beautiful box I'm ecstatic :) thank you once again Shalu for the lovely present ..xx
ReplyDeleteThanks Sam!!! :)
ReplyDeleteLooks so.nice... Which clay should we use...plz tell
ReplyDelete