Save money and have fun making your very own attractive, chic and unique Christmas decorations.
I have already made a Paper wreath, you will find it here- (http://shalmalipatkar.blogspot.com/2011/12/wreath-for-season.html).
There are lots of attractive recycled papers and materials available at crafts shops or you can use any nice patterned papers or magazines you come across too.
http://www.recyclenow.com/
Here I will be showing you how I made our Christmas tree.
Enjoy!!!
Things you will need-
 (missed the scissors :P)
Then cut the baking/wax paper as well as green tissue/crap paper into circles of 16, 13, 10, 7 & 4 cms diameters (I wanted a small tree, you could increase the sizes as per your choice).

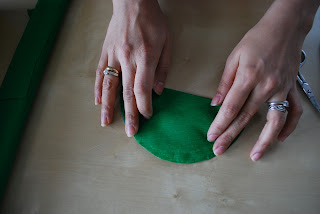
 Now fold them into halves (X4)


I even liked this Christmas tree, maybe will try it next year...
http://www.youtube.com/watch?v=vxZQZcm4XTQ
I have already made a Paper wreath, you will find it here- (http://shalmalipatkar.blogspot.com/2011/12/wreath-for-season.html).
There are lots of attractive recycled papers and materials available at crafts shops or you can use any nice patterned papers or magazines you come across too.
http://www.recyclenow.com/
Here I will be showing you how I made our Christmas tree.
Enjoy!!!
Things you will need-

Then cut the baking/wax paper as well as green tissue/crap paper into circles of 16, 13, 10, 7 & 4 cms diameters (I wanted a small tree, you could increase the sizes as per your choice).

(you will notice my pair of scissors now ;))
And stick them together like so..


Cut the tip off (not very big)

And then form the concertina fold using the already made folds as guidance

Do this for all the circles and stack them one above the other on the pencil (starting the largest first upward), I have supported the pencil using a thread reel.
Finally decorate the tree as per choice!!
Mine looks like this :)

http://www.youtube.com/watch?v=vxZQZcm4XTQ


